

First off a quick follow up to last week’s blog post. Indeed we do have limes forming! Check this out. (Proud plant mama moment)
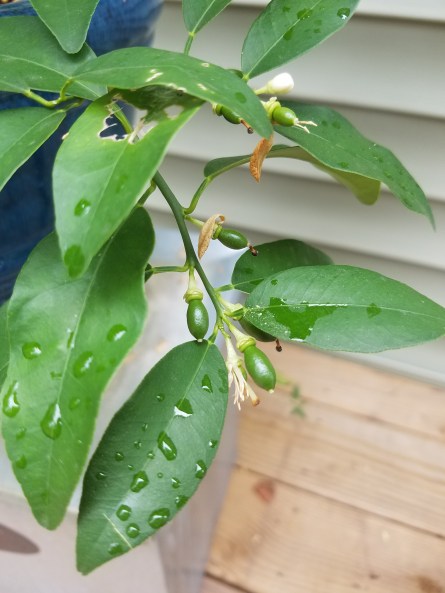
I’ll be curious to see how long it takes for them to fully mature. Hopefully when it’s time to bring this gal in for the winter the transition doesn’t cause issues due to reduced light intensity. In the mean time she’ll keep enjoying the outdoor life.
Okay, now on to today’s post.
Back late last year I started really looking into succulents. A few years before that I had done a workshop and part of it was a make and take with succulents but for some reason, they weren’t jumping out at me. Fast forward 5 years and all the sudden I’m all starry eyed over them. I don’t remember exactly what triggered it, but boy did it come on strong. I apologize for the less then stellar photo, but this started a big downward spiral.
Down the succulent rabbit hole I go.
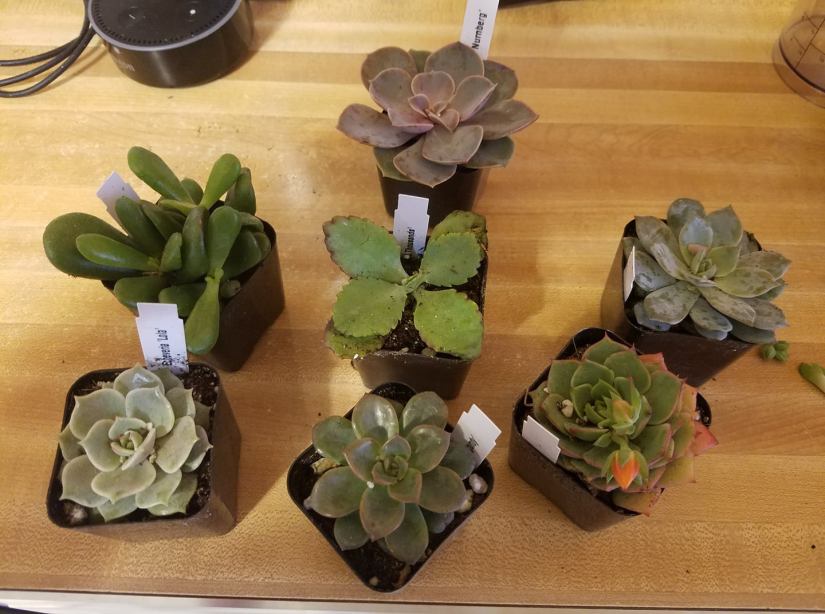
In that picture are 5 echeveria, 1 jade, and in the center is Kalanchoe daigremontiana also affectionately known as Mother of Thousands, though I prefer to call her Mother of Tribbles (I’ll show you why in a bit).
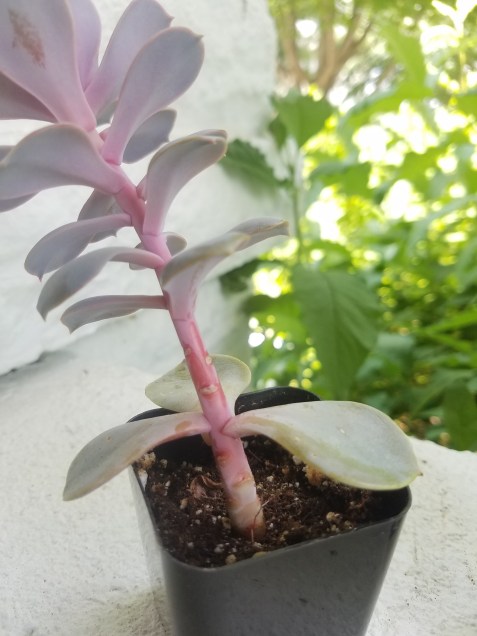
Look at how cute they are! All compact and such things, the echeveria on the bottom right is even in bloom. Fast forward a few months too not having run supplemental lighting near enough since I forgot to install a timer, was using old fluorescent bulbs (should be replaced yearly), and not was a fan of leaving lights on being away from home for work all day. Succulents love bright light and when they aren’t getting enough light they stretch out and can lose color. The picture below is of the same echeveria at the top in the picture above.
Whoops!! Bad Garden Sprout. Now the great thing about succulents is the ability to create more. Yay! You can propagate echeveria from leaves and from removing the very top of the plant.
To propagate from leaves make sure to remove the entire leaf from the stalk. Easiest way is to gently wiggle it back and forth until it separates. The above picture is from June when I was taking pictures for a webinar that I was going to be presenting on care and propagation of succulents. I had also pulled some leaves off of the echeverias back in April and I’m still waiting for some of them to root and start forming plantlets.
Oh hey Echeveria Lola – can you pick up the pace? She was in the bottom right in my down the succulent rabbit hole I go picture above.
I think that they are just being decidedly stubborn and is punishment for me failing to give them adequate light. The echeveria above is Perle Von Nurnberg and a few of the leaves are finally forming plantlets.
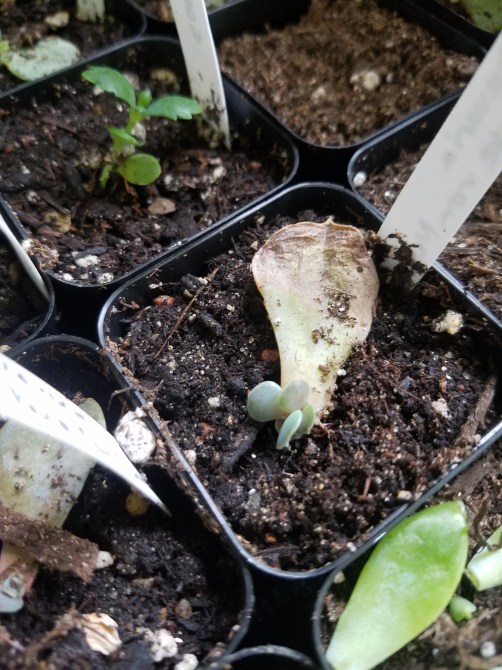
Yay baby echeveria! You can see the original leaf is starting to shrivel and that is perfectly normal.
So yesterday I decided to go on a big spree of removing leaves and tops and to deal with all my stretched out succulents. I ended up with this gorgeous tray of awesomeness.
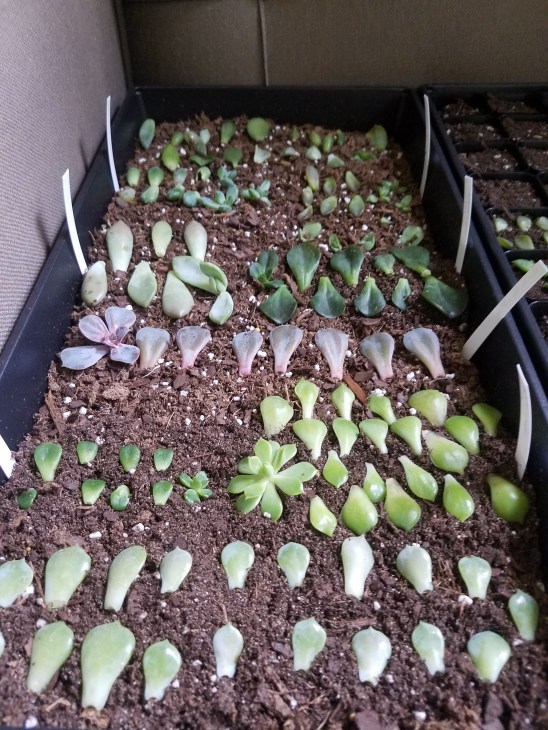
If you noticed there are some tags next to different groups of leaves. I wanted to make sure I labeled them with their varieties for future reference. Not all of these will take but a good number will and when it comes time to hand them off, I want their new plant moms and dads to know what they are getting. Now the waiting game begins.
- Step One – ends of the leaves and tops to callus (takes a few days)
- Step Two – root formation (can seem like forever)
- Step Three – formation of new plants.
I’m patient, I swear.
After a few days and giving time for a callus to form over the exposed surface of the leaf or the top you removed, you want to keep the potting mix somewhat damp. I usually just use a spray bottle and mist the tray every few days. Once rots begin to form, cover them with potting mix to prevent them from drying out. A note on potting mix and succulents – make sure to select a fast draining mix, one that is listed for Cactus and Succulents is best.
I’ll plan on another post in the near future that focuses on succulent care, but I’m a propagation junkie and just had to share my excitement from yesterday.
Now when it comes to Mother of Thousands, aka Mother of Tribbles, aka She Who Shall Not Stop Producing Babies for Days is even easier. Check this out.
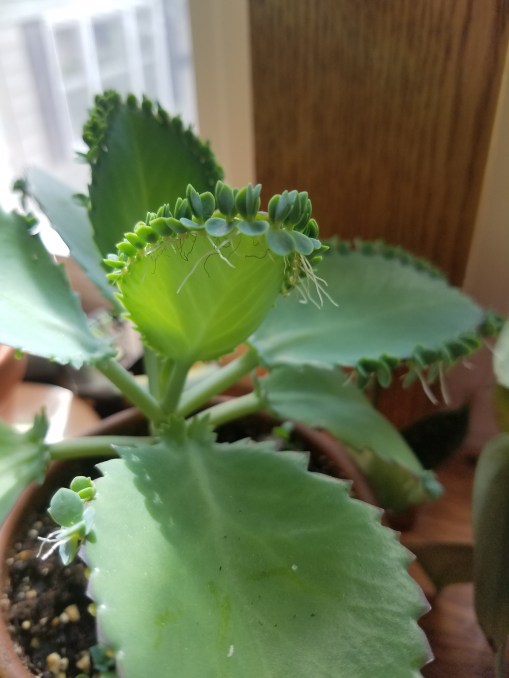
She produces little babies along the leaves and they develop roots while still attached. They fall off very easily and then you can plant them up into a cactus/succulent potting mix. When I was boxing up my succulents for my fiance to take back in advance of the final move, a bunch of little babies fell off, uh hem….you should have seen all the ones at the bottom of the box. Suffice it to say she’s been getting on just fine and already producing more.
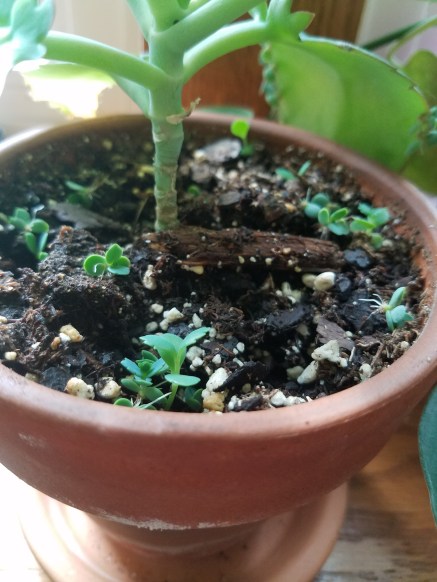
Those were knocked off about 3 weeks ago and you can see they are quite happy. Want to talk prolific? I potted up this little gal just a few weeks ago….

For frame of reference that’s a 2 inch pot and she’s already producing babies. Yeesh! My original plant went from 3 to 29 babies in a matter of 11 days. This little gal is slated as a gift for a friend who is excited to expand their plant collection.
The other succulent that I am “patiently” waiting to get big enough so that I can propagate is this adorable String of Pearls. Grow baby grow!
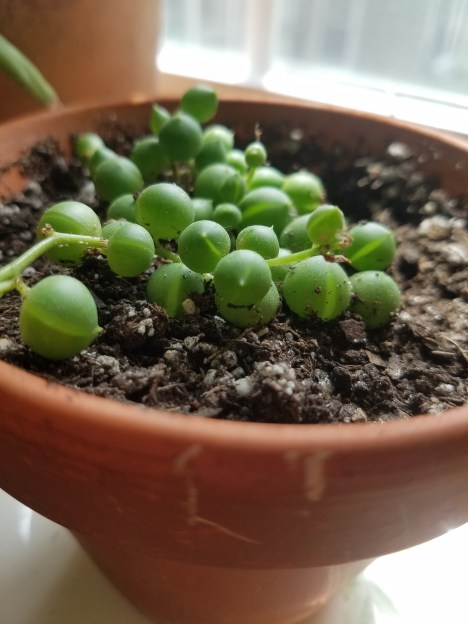
I need the magic grow faster wand and not the watched pot won’t boil wand. She’s definitely gotten a bit bigger since she originally arrived at my doorstep so there’s that.
I’d love to hear about what succulents you have or love, what questions you have about them, or any stories related to succulents. Questions are really great because then I can make sure to address them in a blog post on care as I can guarantee you aren’t the only one with that question.
I’m going to make it a habit at the end of each plant loving post to share a recipe that my fiance and I have made and feel it’s worth sharing. You’ve probably gotten the idea by now that my fiance and I love to cook and part of the reason we want to share recipes with you is the desire to encourage others to cook awesome meals more often.
A few months ago we made Skinnytaste’s Homemade Spinach Manicotti. Mind blown! If you go to the store you’ll see pasta boxes labeled manicotti which is actually cannelloni. From some reading it’s the Americanized version of cannelloni to boot. Further research is required. If you happen to read this and have further light to shed, I’m all ears!
Traditional manicotti uses a crespelle (think crepe) to wrap around the filling. The crespelles were very easy to make, please don’t let that part scare you off because it’s soooo worth it.
Below is a picture of our final dish. A) It doesn’t do it justice to how amazing it tastes B) This was before we got our gas stove (whoa!) C) We so need to make this again. If you decide to make this you can use jarred sauce or make your own. We went with the make you’re own route. I don’t have a set recipe that I follow, I’ve made it so many times I just run on auto-pilot. There are plenty of recipes out there if you need an assist in getting started. Final word – we highly recommend you give this dish a whirl.

Garden happy!
